Table of Contents
ToggleA glass railing deck transforms outdoor living spaces from functional to stunning. Unlike traditional wood or metal railings that block sightlines, glass panels preserve views while meeting code requirements. Whether overlooking a lake, garden, or cityscape, glass railings deliver unobstructed visibility and a contemporary aesthetic that complements nearly any architectural style. Homeowners considering this upgrade face decisions about system types, installation methods, and long-term maintenance. This guide breaks down what makes glass deck railings a smart investment, what they cost, and whether they’re a realistic DIY project or best left to professionals.
Key Takeaways
- Glass railing for decks preserves scenic views while meeting code requirements, offering superior aesthetics and durability compared to traditional wood or metal alternatives.
- A glass railing deck system costs between $6,600–$11,000 for framed installations or $11,000–$17,600 for frameless systems on a 12×16-foot deck, with DIY options available for $4,400–$7,920 in materials.
- Framed glass railings suit DIY installation for homeowners with carpentry experience and straight deck layouts, while frameless systems and elevated decks require professional installation due to precision tolerances.
- Glass railings require minimal maintenance—quarterly cleaning and annual hardware inspection—with expected lifespan exceeding 20 years, outperforming wood railings that need refinishing every 2–3 years.
- All glass railing installations must meet IRC code requirements including 36–42 inch height, 200-pound lateral load resistance, and use of tempered safety glass, with most jurisdictions requiring permits and inspections.
Why Choose Glass Railing for Your Deck?
Unobstructed views rank as the top reason homeowners select glass over traditional materials. Wood balusters and cable railings create visual interruption, glass doesn’t. For properties with scenic backdrops, this makes every square foot of deck feel more expansive.
Low maintenance sets glass apart from wood, which demands staining or painting every 2-3 years. Tempered glass panels resist weathering, won’t splinter, and don’t harbor insects. A quarterly cleaning with glass cleaner keeps them transparent.
Durability comes standard with properly installed systems. Tempered safety glass withstands impact far better than standard glass, and modern framing systems use corrosion-resistant aluminum or stainless steel. Expected lifespan often exceeds 20 years with minimal intervention.
Increased property value follows naturally. Real estate professionals note that glass railings appeal to buyers seeking modern finishes and outdoor entertainment spaces. The clean lines photograph well and signal recent upgrades, which helps during showings.
Light transmission benefits lower-level patios or walkways beneath elevated decks. Where wood railings cast shadows, glass allows natural light to reach spaces below, a practical advantage for multi-level outdoor designs.
Types of Glass Deck Railing Systems
Glass railing systems fall into two main categories, each with distinct installation requirements and visual impact.
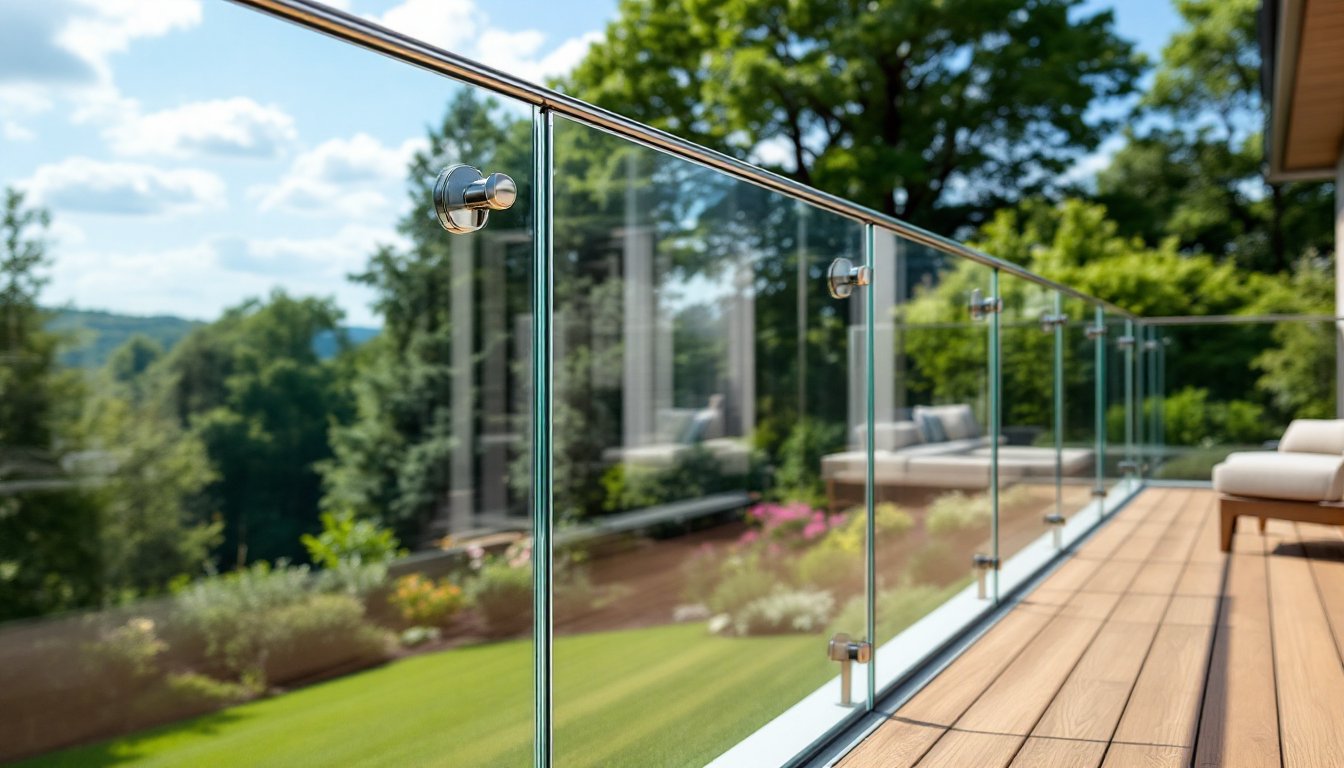
Frameless vs. Framed Glass Railings
Frameless systems mount thick glass panels (typically ½-inch tempered glass) directly into top and bottom channels or use post-mounted clamps. Hardware remains minimal, often just stainless steel standoffs spaced 36-48 inches apart along the deck perimeter. This design maximizes transparency and creates a floating appearance.
Pros:
- Cleanest sightlines
- Modern, high-end aesthetic
- Easier to clean (no frame crevices)
Cons:
- Higher material cost
- Requires precise measurements and leveling
- Glass thickness adds weight to deck structure
Framed systems encase glass panels within aluminum or composite rails. The frame provides structural support, allowing thinner glass (¼ to ⅜ inch) and simplifying installation. Rails typically come in standard colors (black, bronze, white) or wood-grain finishes.
Pros:
- More forgiving installation tolerances
- Lower glass costs
- Frame conceals mounting hardware
- Better DIY candidate
Cons:
- Frame edges slightly obstruct views
- More surfaces to maintain
- Can trap dirt along gaskets
Post-and-panel hybrids combine elements of both. Glass panels span between posts without continuous top or bottom rails, preserving some transparency while providing clear attachment points. This approach suits decks with existing post structures or irregular layouts.
For decks in coastal areas, DIY enthusiasts often prefer stainless steel hardware over aluminum to resist salt corrosion. Inland installations can use powder-coated aluminum without durability concerns.
Cost Considerations for Glass Deck Railings
Budget expectations vary widely based on system type and project scope. As of April 2026, typical costs break down as follows:
Material costs:
- Framed systems: $150-$250 per linear foot (includes glass, rails, and posts)
- Frameless systems: $250-$400 per linear foot (thicker glass, specialized hardware)
- DIY kits (framed): $100-$180 per linear foot (homeowner provides labor)
Professional installation:
- Labor typically adds $50-$100 per linear foot depending on deck height, access, and regional labor rates
- Complex layouts with stairs or angles increase labor by 25-40%
Total project estimates:
- A 12×16-foot deck with 44 linear feet of railing runs $6,600-$11,000 for framed systems (materials + install)
- The same deck with frameless glass: $11,000-$17,600
- DIY framed installation: $4,400-$7,920 (materials only)
Hidden costs to anticipate:
- Structural reinforcement: Older decks may need additional blocking or upgraded ledger boards to handle glass weight. Budget $500-$1,500 for carpentry.
- Permits: Most jurisdictions require permits for railing replacement. Fees range from $50-$300.
- Delivery and handling: Full glass panels require careful transport. Suppliers often charge $200-$500 for delivery within 50 miles.
- Custom cuts: Non-standard panel sizes or angled cuts add 15-30% to glass costs.
Regional price variations matter. Coastal markets (Southern California, South Florida, Northeast metro areas) skew 20-30% higher than Midwest or rural locations. Material availability also affects pricing, supply chain delays can push lead times to 6-8 weeks for custom orders.
Financing options exist through home improvement loans or contractor payment plans, but interest adds to long-term costs. Paying cash avoids finance charges that can inflate a $10,000 project by $1,500-$2,000 over 24-36 months.
Installation Process: DIY or Professional?
Glass railing installation demands precision that exceeds typical deck projects. Whether to DIY depends on experience level, deck configuration, and chosen system type.
When DIY makes sense:
- Homeowner has prior railing or carpentry experience
- Deck features straight runs with minimal angles
- Using a framed system with pre-drilled posts
- Deck structure meets current load requirements (no reinforcement needed)
- Local codes allow homeowner-installed railings with inspection
Critical DIY considerations:
Tools required:
- Laser level (accuracy within 1/16 inch matters)
- Drill with masonry and metal bits
- Torque wrench for consistent fastener tension
- Clamps (at least four 24-inch bar clamps)
- Safety gear: cut-resistant gloves, safety glasses, steel-toed boots
Installation steps (framed system):
-
Verify deck structure. Check that rim joists and decking can support railing loads. IRC code requires railings to withstand 200 pounds of lateral force at any point.
-
Establish post spacing. Most systems specify 4-6 feet between posts. Mark locations, ensuring they align with underlying framing or blocking.
-
Install posts. Use through-bolts (not lag screws alone) with backing plates beneath the deck. Posts must be plumb in both directions, laser levels eliminate guesswork.
-
Mount rails. Top and bottom rails attach to posts via brackets. Double-check level before final tightening, out-of-level rails cause glass binding.
-
Insert glass panels. Slide tempered glass into channels from the top. Rubber gaskets cushion glass and prevent rattling. Never force panels, if they don’t slide easily, rail alignment needs adjustment.
-
Secure and seal. Install retaining strips or compression fittings per manufacturer specs. Apply exterior-grade silicone at panel edges if specified.
-
Inspect and test. Apply lateral pressure to confirm stability. Check that all fasteners meet torque specifications.
When to hire professionals:
- Frameless systems (tolerances under 1/8 inch required)
- Decks above 10 feet in height
- Stairs or multi-level railings
- Properties in high-wind zones requiring engineered connections
- Homeowner lacks confidence in measuring and leveling
Professional installers carry liability insurance, provide warranties (typically 1-2 years on labor), and complete projects in 2-3 days versus a weekend DIY effort that may stretch into additional weekdays when issues arise.
Permit and inspection reality: Most jurisdictions classify railing work as a structural modification requiring permits. Inspectors verify post attachment, rail height (36-42 inches for residential decks), and glass specifications. Failing inspection means redoing work to code, professionals navigate this process routinely, while DIYers risk costly corrections.
Maintenance and Care Tips
Glass railings require less maintenance than wood but aren’t maintenance-free. Establishing a routine prevents minor issues from escalating.
Cleaning schedule:
- Monthly: Rinse panels with hose water to remove dust, pollen, and salt spray
- Quarterly: Clean with glass cleaner and microfiber cloths. Avoid abrasive pads that scratch tempered glass.
- Annually: Inspect and clean frame channels, gaskets, and drainage holes. Remove trapped debris with a small brush.
Best cleaning products:
- Standard glass cleaners (ammonia-based) work for most situations
- For hard water stains: white vinegar diluted 1:1 with water
- Coastal installations: specialty marine glass cleaners resist salt buildup
Hardware inspection:
- Check fasteners quarterly, coastal environments may show corrosion on lower-grade stainless steel
- Tighten loose screws before they work completely free
- Replace deteriorated gaskets promptly to prevent glass rattling and potential cracking
Seasonal considerations:
- Winter: Remove snow gently with a soft brush. Never chip ice off glass.
- Spring: Inspect for winter damage, particularly around post bases where freeze-thaw cycles stress connections.
- Summer: UV exposure gradually degrades some gasket materials. Watch for brittleness or gaps.
Common problems and solutions:
Water spots: Hard water minerals etch glass over time. Squeegee after rain in areas with mineral-heavy water, or apply a glass sealant that repels water for 3-6 months.
Hazy appearance: Usually surface buildup rather than glass degradation. Try a dedicated glass polish before assuming replacement is necessary.
Squeaking or rattling: Indicates loose hardware or degraded gaskets. Tighten connections and replace gaskets (available from manufacturers or marine supply stores).
Homeowners following these practices report glass railings maintain clarity and structural integrity for 15-20 years before requiring component replacement. Many deck railing upgrades deliver similar longevity when properly maintained, but glass systems offer the advantage of simple cleaning without refinishing.
Safety Standards and Building Codes
Glass railings must meet the same structural requirements as any deck railing, plus additional specifications for glass materials.
International Residential Code (IRC) requirements:
- Height: Guardrails must be 36 inches minimum for decks less than 30 inches above grade. Most jurisdictions enforce 42 inches for elevated decks.
- Load resistance: Railings must withstand 200 pounds of lateral force applied horizontally at any point along the top rail.
- Opening size: Gaps between glass panels or posts can’t allow a 4-inch sphere to pass through (prevents child entrapment).
Glass specifications:
- Only tempered safety glass meets code for railings. When broken, it fragments into small, relatively harmless pieces rather than dangerous shards.
- Minimum thickness varies by panel size and support spacing. Typical requirements:
- Framed systems: ¼ inch for panels under 10 square feet
- Frameless systems: ½ inch for panels up to 18 square feet
- Some jurisdictions require laminated glass for elevated applications. Lamination holds fragments together even if tempered glass breaks, reducing fall-through risk.
Testing and certification:
- Reputable manufacturers provide engineering data and ICC-ES evaluation reports demonstrating code compliance.
- Look for glass panels marked with permanent etching indicating tempered or laminated specification.
- DIY systems should include manufacturer documentation for submitting with permit applications.
Local code variations:
- Coastal high-wind zones may require impact-rated glass similar to hurricane window standards.
- California and other seismic regions sometimes mandate additional post reinforcement.
- Historic districts or HOAs may restrict railing styles, verify approval before purchasing materials.
Liability considerations:
- Insurance companies occasionally question owner-installed glass railings. Document all work with photos, maintain receipts, and pass final inspection to protect homeowner’s insurance coverage.
- Professional installations include liability coverage if someone is injured due to railing failure.
Inspection process:
- Schedule inspection after posts are installed but before glass panels are inserted, inspectors need to verify structural connections.
- Final inspection occurs after full assembly. Be prepared to demonstrate load resistance if requested.
Code compliance isn’t optional. Unpermitted work discovered during home sales forces expensive corrections or price reductions. Future owners deserve confidence that railings meet safety standards, and outdoor living projects gain value when properly documented and inspected.