Table of Contents
ToggleInstalling patio pavers yourself isn’t rocket science, but it does require planning and some elbow grease. The payoff? A custom outdoor space for a fraction of what a contractor charges, typically $8–$20 per square foot DIY versus $15–$40 installed. Whether someone’s replacing a cracked concrete slab or carving out a new seating area, pavers offer durability, drainage, and design flexibility that poured surfaces can’t match. This guide walks through material selection, base prep (the most critical step), installation, and finishing so the project lasts decades, not seasons.
Choosing the Right Pavers for Your DIY Patio Project
Paver material affects cost, longevity, and ease of installation. Here’s what’s available in 2026:
Concrete pavers are the DIY workhorse, $2–$6 per square foot, consistent sizing (common nominal sizes: 4″×8″, 6″×6″, 12″×12″), and available at every big-box store. They come in dozens of colors and textures, from smooth to tumbled. Concrete handles freeze-thaw cycles well if manufactured to ASTM C936 standards, which most reputable brands meet.
Natural stone pavers (flagstone, bluestone, slate) run $10–$30 per square foot and deliver a high-end look but are heavier and trickier to cut. Thickness varies, 3/4″ to 2″, so base prep must account for inconsistency. Stone also requires sealing to resist staining.
Permeable pavers (grid systems or spaced concrete) allow water infiltration, which matters in jurisdictions with stormwater regulations. They cost slightly more than standard concrete but can eliminate runoff issues.
Brick pavers ($5–$10 per square foot) offer classic charm but softer clay bricks can spall in harsh winters. Look for “SW” (severe weathering) rated bricks per ASTM C62.
For most DIYers, standard concrete pavers in 6″×9″ or 12″×12″ format strike the best balance of cost, availability, and handling. A 10’×12′ patio (120 sq ft) needs roughly 320 pavers at 6″×9″ with 5% waste factor.
Essential Tools and Materials You’ll Need
Gather everything before breaking ground. Most tools are rentable if not already in the garage.
Tools:
- Plate compactor (rentals run $60–$90/day), crucial for tamping base layers
- Level (4′ or longer) and string line with stakes
- Rubber mallet for setting pavers
- Masonry saw or angle grinder with diamond blade for cuts (a circular saw with masonry blade works but dulls fast)
- Wheelbarrow, square-nose shovel, landscape rake
- Safety gear: gloves, safety glasses, dust mask (N95 or better when cutting), hearing protection
Materials:
- Pavers (calculate area + 5–10% overage)
- Crushed stone base (3/4″ minus gravel): 4–6″ depth for pedestrian traffic: figure 0.5 ton per 100 sq ft at 4″ depth
- Bedding sand (concrete sand, not play sand): 1″ layer: roughly 0.15 ton per 100 sq ft
- Polymeric sand for joints (sweeps in and hardens when wetted)
- Landscape fabric (optional but helps suppress weeds)
- Edge restraint (plastic paver edging or aluminum), critical to prevent paver creep
Some areas require a geotextile fabric between subgrade and base if soil is clay-heavy or prone to shifting. When dealing with outdoor living spaces, proper material layering prevents the heartbreak of a sunken patio two seasons later.
Preparing Your Patio Base: The Foundation for Success
Base prep accounts for 70% of a paver project’s success. Skip steps here and the surface will settle, heave, or buckle.
1. Layout and excavation: Mark the patio perimeter with stakes and string. Patios should slope 1/4″ per foot away from structures for drainage (that’s a 2.5″ drop over 10 feet). Excavate to a depth of 7–8 inches below final paver surface for typical installations (4″ base + 1″ sand + 2–3″ paver thickness).
2. Check for utilities: Call 811 (DigSafe in the US) at least 48 hours before digging. Gas, electric, and irrigation lines love to hide under future patios.
3. Subgrade compaction: The native soil must be firm. Remove any organic material (roots, sod). Compact the subgrade with the plate compactor, make two passes in perpendicular directions. If the soil is soft clay, consider a layer of geotextile fabric.
4. Base layer: Spread crushed stone (3/4″ minus angular gravel) in 2-inch lifts. Rake it level, mist lightly with water, then compact. Repeat for the second lift. The “minus” designation means it contains fines that lock together when compacted, don’t substitute round pea gravel. Check level and slope frequently: fixing it later is miserable.
5. Bedding sand: Spread 1 inch of concrete sand (sharp sand, not masonry or play sand). Screed it smooth using a notched 2×4 riding on edge restraints or temporary guides. Don’t compact the sand, pavers will settle into it. Many DIY improvements fail because builders compact the bedding layer, which prevents proper paver seating.
Base prep isn’t glamorous, but it’s the difference between a 20-year patio and a 2-year disaster.
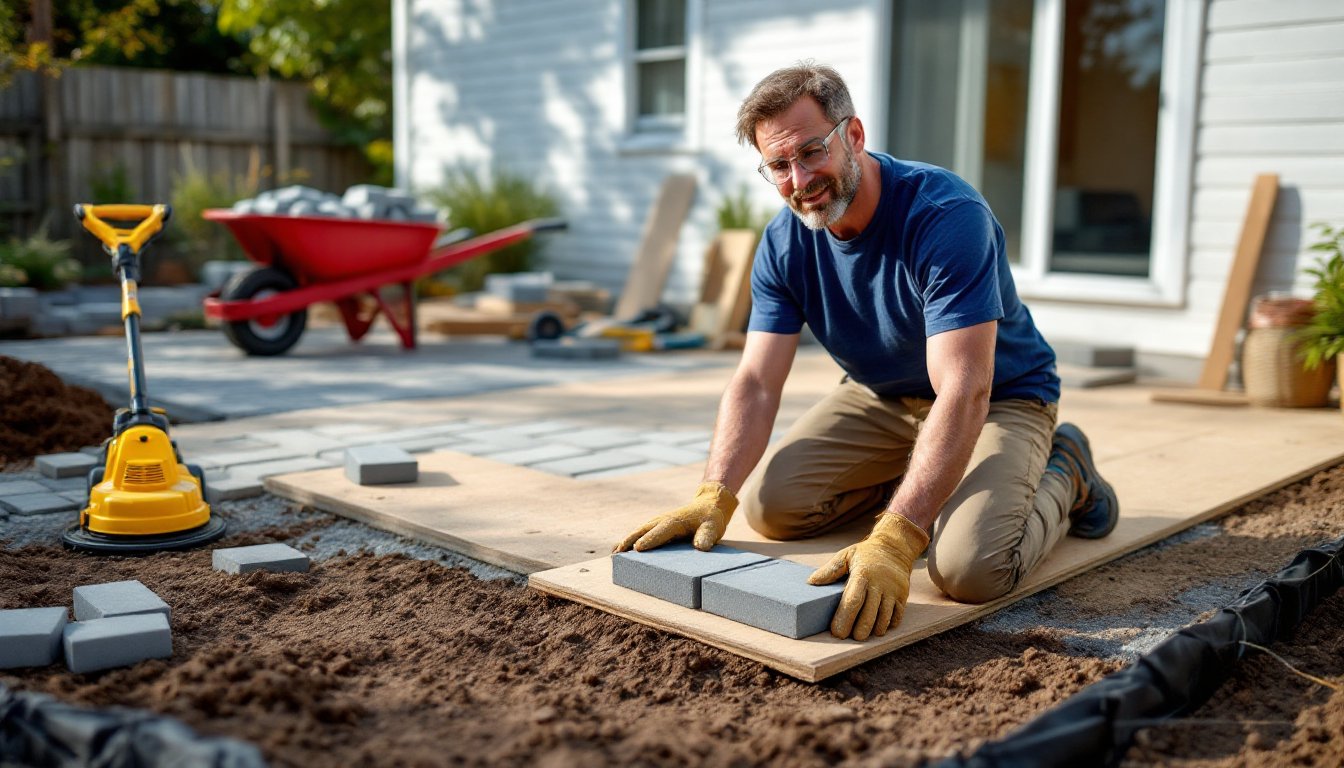
Step-by-Step Guide to Laying Your Patio Pavers
With the base prepped, paver installation moves quickly, if done methodically.
1. Install edge restraint first. Plastic paver edging or aluminum L-brackets anchor to the base with 10-inch spikes every 12–18 inches. This prevents the perimeter pavers from creeping outward over time. Set restraints at finish height.
2. Start from a fixed reference. Begin laying pavers against a straight edge, house foundation, existing walkway, or a taut string line. Work outward in a pattern (running bond, herringbone, basket weave). Running bond (brick-style) is easiest: herringbone offers more interlock and is ideal for driveways but takes longer.
3. Lay pavers with consistent joint spacing. Most pavers have built-in spacer tabs: otherwise maintain 1/8″ to 3/16″ gaps. Set each paver gently on the sand, don’t drag or twist. Tap lightly with a rubber mallet to seat, checking level every few pavers. If a paver sits low, lift it and add a pinch of sand beneath.
4. Work in sections. Complete roughly 10-square-foot areas before moving forward. Kneel on a scrap of plywood to distribute weight if working on freshly laid pavers. For those tackling a porch and outdoor living project with irregular shapes, dry-lay pavers first to visualize cuts and pattern flow.
5. Don’t walk on unsecured pavers more than necessary. They’ll shift before jointing sand locks them in place.
Cutting and Fitting Pavers Around Edges
Unless the patio is perfectly modular (rare), cuts are inevitable. Measure each cut individually, pavers and edges aren’t always square.
Mark and score: Use a pencil and speed square to mark the cut line on all four sides. A masonry saw (rentable wet saw) delivers clean, fast cuts with minimal dust. For a handful of cuts, an angle grinder with a diamond blade works but generates significant dust, work outside and wear an N95 mask.
Partial cuts: When fitting around posts, pipes, or curves, make multiple straight cuts to approximate the shape, then nibble away waste with the grinder or a brick chisel.
Safety first: Always wear eye protection and gloves. Silica dust from cutting pavers is a serious respiratory hazard, wet cutting or dust suppression is non-negotiable for prolonged work.
Cut pavers go at the perimeter where edge restraint hides any rough edges. Save the prettiest, most consistent pavers for high-visibility areas near doors and seating zones.
Finishing Touches: Sand, Seal, and Maintain Your New Patio
Pavers are down, but the patio isn’t finished until joints are filled and locked.
1. Sweep in polymeric sand. This isn’t ordinary sand, polymeric sand contains additives that harden when activated by water, locking pavers together and resisting weed growth and ant colonization. Pour sand over the surface and sweep diagonally into joints with a push broom. Make several passes to fill joints completely. Remove all excess sand from paver faces before wetting.
2. Compact and activate. Run the plate compactor over the pavers (use a rubber pad attachment if available to prevent scuffing). This seats pavers into the bedding layer and densifies joint sand. Mist the surface with water per the polymeric sand manufacturer’s instructions, typically a light mist, wait, then a heavier soak. Avoid puddling, which can cause hazing on paver surfaces. Let cure 24–48 hours before heavy use.
3. Optional sealing. Paver sealer enhances color and adds stain resistance, especially for natural stone or light-colored concrete. Water-based acrylic sealers ($30–$50 per gallon, covering ~200 sq ft) are DIY-friendly. Apply with a roller after joints fully cure (wait 30–60 days). Sealing isn’t required for concrete pavers but can extend appearance.
Maintenance: Sweep regularly and rinse with a hose. For stains, use a pH-neutral cleaner, acidic or alkaline cleaners can damage pavers or etch sealers. Re-apply polymeric sand if joints erode (typical every 3–5 years in high-traffic areas). Reseal every 2–3 years if initially sealed.
Winter care: Avoid metal shovels and rock salt on pavers. Use plastic shovels and calcium chloride or sand for traction. Salt can spall concrete and stain stone.
Conclusion
A DIY paver patio is a weekend or two of hard work, but the result is a durable, attractive outdoor space that adds real value to a home. The keys: choose pavers suited to the climate, don’t skimp on base prep, and lock everything in with quality polymeric sand. Mistakes are fixable early, just lift and relay, but proper execution from the start saves time and frustration. With materials under $1,000 for a typical 120-square-foot patio and tools largely rentable, this project delivers high impact for modest investment.