Table of Contents
ToggleGrey and white kitchen cabinets have become the go-to choice for homeowners looking to blend classic elegance with contemporary style. The pairing creates visual depth without overwhelming a space, and it works across nearly every design aesthetic, from farmhouse to minimalist modern. Unlike all-white kitchens that can feel sterile or all-grey spaces that risk appearing cold, the two-tone combination strikes a balance that’s both warm and sophisticated. Whether planning a full remodel or a cabinet refresh, understanding how to deploy these neutrals strategically will save time, money, and buyer’s remorse down the road.
Key Takeaways
- Grey and white kitchen cabinets strike a sophisticated balance between classic elegance and modern style, offering flexibility that single-color schemes can’t match while appealing to a wider range of home buyers.
- Horizontal layouts with white uppers and grey lowers are the most common and forgiving approach, keeping kitchens bright while concealing daily wear on lower cabinets.
- Undertones matter more than color names—test paint samples in different lighting conditions for 48 hours and hold chips against existing finishes to avoid costly color clashes.
- White quartz or marble countertops with grey veining, subway tile backsplashes, and brushed nickel or brass hardware complement grey and white cabinetry without competing for visual attention.
- Painting existing cabinets requires thorough prep work (degreaser, 150-grit sanding, bonding primer), two coats of water-based cabinet enamel, and 48–72 hours of cure time before reinstalling doors.
- The 60-30-10 color rule—60% white, 30% grey, 10% accent color—prevents kitchens from feeling monochromatic while maintaining visual harmony.
Why Grey and White Kitchen Cabinets Are the Perfect Combination
The grey-and-white palette delivers flexibility that single-color schemes can’t match. White cabinets reflect light and make small kitchens feel larger, while grey adds dimension and hides wear better than pure white, especially around handles and lower cabinets that take daily abuse.
From a resale perspective, neutral two-tone cabinets appeal to a wider range of buyers than bold or trendy colors. Real estate agents often cite kitchens with grey and white cabinetry as easier to stage and photograph, which translates to faster sales and fewer price reductions.
This combination also plays well with existing home features. Homes with cool-toned countertops (like grey quartz or marble) or warm wood floors both benefit, because the palette acts as a bridge rather than competing with established finishes. Homeowners can update hardware, backsplashes, or lighting without needing to repaint or reface cabinets, an advantage when design trends shift.
One practical reason contractors favor grey and white: it’s forgiving. Minor variations in paint batches or cabinet finishes are less noticeable across two tones than in a single shade, which reduces costly touch-up work during installation. For DIYers, that margin of error can mean the difference between a professional-looking job and a visible mistake.
Popular Grey and White Kitchen Cabinet Styles and Layouts
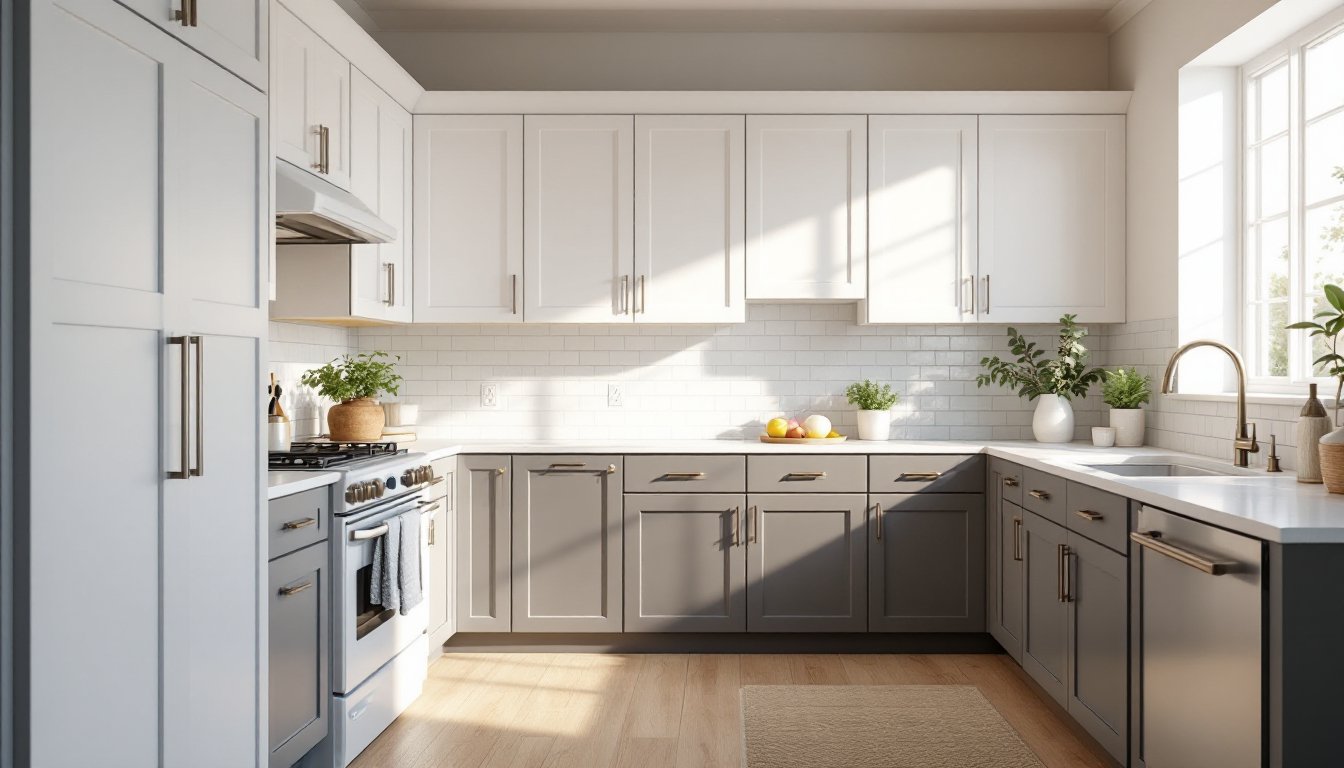
The most common approach pairs white upper cabinets with grey lowers. This layout keeps the upper half of the kitchen bright and open while grounding the space with darker lowers that conceal scuffs from shoes, pets, and bags. It’s especially effective in kitchens with limited natural light, where white uppers maximize brightness without making the room feel top-heavy.
Some homeowners flip the formula, grey uppers and white lowers, to draw the eye downward and create a cozier, more intimate feel. This works well in kitchens with high ceilings or exposed beams, where bringing visual weight down prevents the space from feeling cavernous. But, grey uppers can make a kitchen feel smaller if ceiling height is under 9 feet.
Another layout highlights the island as a focal point by painting or staining it grey while keeping perimeter cabinets white. This approach works in open-concept homes where the island serves as a room divider. A grey island in charcoal or slate tones provides contrast without requiring a full two-tone cabinet commitment, and it’s easier to repaint later if tastes change.
For kitchens with glass-front or open shelving, alternating grey and white cabinets by section rather than by height creates visual rhythm. This strategy is popular in galley kitchens or single-wall layouts, where horizontal breaks prevent long runs of cabinets from feeling monotonous.
Two-Tone Cabinet Configurations
Two-tone cabinets come in three main configurations: horizontal splits (uppers vs. lowers), focal-point differentiation (island or pantry in a contrasting color), and asymmetrical layouts (grey on one wall, white on another). Horizontal splits are the easiest for DIY painters because they follow natural cabinet breaks and don’t require masking mid-door.
Focal-point differentiation suits kitchens where one element, like a large island or floor-to-ceiling pantry, already commands attention. Painting that feature grey while leaving surrounding cabinets white reinforces hierarchy without creating visual clutter. This method also lets homeowners test a darker shade before committing to painting half the kitchen.
Asymmetrical layouts work in L-shaped or U-shaped kitchens where one wall gets more natural light. Placing white cabinets on the darker wall and grey on the brighter wall balances light distribution throughout the day. It’s a more advanced design move, so mock up the layout digitally or with paint samples on poster board before cutting in.
Choosing the Right Shades of Grey and White for Your Cabinets
Not all whites are created equal. Pure white (no undertones) reads crisp and modern but can feel stark under cool LED lighting. Warm whites with cream or beige undertones soften the look and pair better with brass or gold hardware. Cool whites with blue or grey undertones match stainless steel appliances and contemporary fixtures.
Test paint samples on cabinet doors in different lighting, morning sun, midday overheads, and evening task lighting, before committing. A white that looks perfect in the store can turn yellow under warm bulbs or blue-grey under north-facing windows. Buy quart-sized samples of at least three shades and live with them for 48 hours.
For grey, the spectrum runs from pale greige (grey-beige hybrids) to charcoal. Light greys with warm undertones prevent the kitchen from feeling cold, especially in homes with limited natural light. Mid-tone greys provide contrast without overpowering white cabinets and hide fingerprints better than lighter shades. Dark greys (charcoal or slate) create drama but require more maintenance and can make small kitchens feel cramped unless paired with ample lighting.
Undertones matter more than the color name on the can. A grey labeled “modern” might have blue undertones that clash with warm wood floors, while a “greige” could pull too brown next to cool-toned countertops. Interior designers often recommend neutral palettes that anchor around undertones rather than strict color categories. Hold paint chips against existing finishes, countertops, floors, backsplashes, to spot undertone conflicts before painting.
Countertops, Backsplashes, and Hardware That Complement Grey and White Cabinets
White quartz or marble countertops with grey veining tie the two cabinet colors together and create visual flow. Quartz requires less maintenance than marble and resists staining, which matters near sinks and prep areas. Budget-conscious homeowners can achieve a similar look with laminate that mimics stone, though edge details and thickness will give it away up close.
Grey countertops, concrete, soapstone, or grey granite, ground an all-white kitchen or complement grey lower cabinets. Concrete countertops offer an industrial edge but require sealing every 1-2 years to prevent stains. Soapstone darkens over time and develops a patina, which some homeowners love and others find unpredictable.
For backsplashes, white subway tile is the default for good reason: it’s affordable, timeless, and doesn’t compete with cabinet colors. A grey grout line (instead of white) adds subtle texture without requiring patterned tile. Grey tile backsplashes, in subway, hexagon, or arabesque patterns, work when white cabinets dominate, but too much grey can make the kitchen feel monochromatic. Many kitchen design resources suggest using the 60-30-10 rule: 60% white, 30% grey, 10% accent color in fixtures or décor.
Hardware finish dramatically shifts the overall vibe. Brushed nickel and stainless steel lean modern and pair with cool-toned greys and whites. Matte black hardware creates sharp contrast and suits contemporary or industrial kitchens. Brass, gold, or bronze warm up the palette and complement greige or warm whites. Oversized pulls (5-inch center-to-center or longer) look more current than small knobs, but ensure cabinet stiles are wide enough to accommodate them without crowding.
Mixing metals, say, black faucets with brass cabinet pulls, can work if one finish appears on larger fixtures and the other on smaller accents. Avoid using three or more metal finishes unless the design goal is eclectic: otherwise, it reads as indecisive rather than intentional.
How to Install or Paint Grey and White Kitchen Cabinets Yourself
Installing new cabinets is a multi-day job that requires precision. Start by removing old cabinets, patching and painting walls, and verifying that walls are plumb and floors are level. Shim cabinets as needed during installation to prevent doors from swinging open or gaps from appearing.
For upper cabinets, locate studs with a stud finder and mark them clearly. Use a ledger board (a temporary 1×3 or 1×4 screwed level into studs) to support cabinets during installation. This frees both hands for adjustments and fastening. Hang uppers before lowers to avoid working over base cabinets. Secure each cabinet with 3-inch cabinet screws driven through the back rail into studs, drywall anchors aren’t sufficient for loaded cabinets.
Lower cabinets install after uppers are level and secured. Start with a corner cabinet if the layout includes one, then work outward. Clamp adjacent cabinets together before fastening to ensure face frames align. Check for level front-to-back and side-to-side before driving screws: even small misalignments compound across a row of cabinets.
Painting existing cabinets is the budget-friendly alternative. Prep is 70% of the job. Remove all doors, drawer fronts, and hardware. Label each piece with painter’s tape indicating its location, trust the system, not memory. Clean everything with a degreaser (TSP or a TSP substitute) to remove cooking oils that prevent paint adhesion.
Sand all surfaces with 150-grit sandpaper to scuff the existing finish. The goal isn’t removing old paint or stain entirely, just creating a mechanical bond for primer. Wipe down with a tack cloth after sanding.
Prime with a bonding primer, shellac-based (BIN) or acrylic bonding primer works on laminate, wood, and previously painted surfaces. Roll or spray primer on doors laid flat: it dries faster and eliminates drips. For cabinet boxes, use a brush in corners and a small roller on flat surfaces.
Once primer dries (typically 1-2 hours), lightly sand again with 220-grit sandpaper to smooth any raised grain or brush marks. Apply two coats of paint, sanding lightly between coats. Water-based cabinet enamel or acrylic-alkyd hybrid paints provide a hard, durable finish that resists chipping better than standard wall paint. A paint sprayer (HVLP or airless) delivers the smoothest finish, but a high-density foam roller works if spraying isn’t an option.
Let paint cure for 48-72 hours before reinstalling doors and hardware. Paint continues hardening for up to two weeks, so avoid slamming doors or stacking dishes on shelves during that period.
Conclusion
Grey and white cabinets deliver a design-forward kitchen that won’t feel dated in five years. The combination offers enough contrast to stay interesting while remaining neutral enough to accommodate changing hardware, countertops, and décor. For those looking at examples of how white kitchens evolve with grey accents, the principle holds: thoughtful planning upfront, especially around undertones and configuration, saves costly corrections later. Whether installing new cabinets or refinishing existing ones, the effort pays off in both daily enjoyment and long-term home value.