Table of Contents
ToggleIf you’ve ever stared at a massive 34-inch ultrawide or dual 32-inch monitors wobbling on a flimsy desk mount, you know the problem. Standard monitor arms buckle under the weight of today’s high-end displays, leaving users with sagging screens, limited adjustability, and a nagging fear that their $800 monitor might crash to the floor mid-Zoom call. Heavy duty monitor arms solve that problem by supporting larger, heavier displays, often 30 pounds or more, while offering the same ergonomic flexibility you’d expect from lighter-duty models. Whether someone’s building a multi-monitor trading setup, upgrading a home office with oversized screens, or mounting professional-grade displays for CAD work, understanding what separates a true heavy duty arm from standard options is the first step toward a safer, more comfortable workspace.
Key Takeaways
- A heavy duty monitor arm supports displays weighing 20 to 40+ pounds with reinforced steel construction and upgraded spring mechanisms, solving sagging and positioning issues with oversized screens like ultrawides and professional-grade monitors.
- Critical features for heavy duty monitor arms include 16-gauge or thicker steel build, reliable gas or mechanical springs, integrated cable management, and weight capacity that exceeds your monitor’s actual weight by at least 5 pounds to account for leverage.
- VESA compatibility verification and proper desk structure assessment are essential before purchasing—ensure your desk is solid (not hollow-core) and confirm mounting holes match standard 100x100mm, 200x200mm, or larger patterns.
- Installation requires two people for monitors over 25 pounds and careful attention to spring tension adjustment; common mistakes include ignoring desk compatibility, trusting inflated weight ratings without context, and underestimating cable management needs.
- Desk clamp mounts offer the best balance for home offices, while grommet and wall mounts suit specific situations like standing desks or ultra-heavy setups; investing in a quality heavy duty monitor arm future-proofs your setup for monitor size upgrades.
What Is a Heavy Duty Monitor Arm and Who Needs One?
A heavy duty monitor arm is a mounting system designed to support monitors weighing 20 to 40+ pounds, compared to standard arms that max out around 15-20 pounds. These arms use reinforced steel construction, upgraded gas springs or mechanical springs, and larger mounting hardware to handle the torque created by heavier, larger displays.
They’re not just for oversized screens. Anyone using a monitor 27 inches or larger, especially ultrawides, curved panels, or professional-grade displays with metal housings, should consider a heavy duty option. Standard arms may technically support the weight on paper, but they often sag over time or fail to hold position when tilted or extended.
Who benefits most? Multi-monitor users running dual 32-inch screens, creative professionals working with color-accurate displays that weigh more due to quality build materials, traders or analysts needing stable triple-monitor setups, and gamers using large curved ultrawides. If the monitor feels like a small TV when lifting it out of the box, it probably needs a heavy duty arm.
One more consideration: heavy duty arms are also necessary when mounting monitors with metal enclosures rather than plastic. Professional-grade displays from brands targeting design or medical imaging markets often weigh significantly more than consumer models of the same screen size.
Key Features to Look for in a Heavy Duty Monitor Arm
Not all “heavy duty” arms are created equal. Marketing claims don’t always match real-world performance, so focus on these specific features when comparing options.
Build material matters more than most buyers realize. Look for 16-gauge or thicker steel in the arm’s main structure, aluminum alloys can work but need to be aircraft-grade to handle weight without flexing. The mounting clamp or grommet base should be machined steel, not cast alloy, to avoid cracking under load.
Spring mechanism type determines how well the arm maintains position. Gas springs (pneumatic cylinders) offer smooth, tool-free height adjustment but can lose pressure over time with very heavy loads. Mechanical springs (coil or torsion) require Allen key adjustments but hold position reliably for years, even with 40-pound monitors. Some premium arms use dual gas springs for extra lifting power.
Cable management should be integrated, not an afterthought. Heavy duty monitors typically come with thicker power cables and multiple video inputs (DisplayPort, HDMI, USB-C). Arms with enclosed cable channels or spring-loaded clips keep things tidy without adding bulk.
The range of motion spec sheet needs scrutiny. Check for tilt range (usually -45° to +45°), swivel range (180° to 360°), and extension reach (12 to 24 inches from the mount point). Heavier arms may have reduced range compared to lighter models due to the physics of moving weight.
Weight Capacity and VESA Compatibility
Weight capacity should exceed the monitor’s actual weight by at least 5 pounds. A 30-pound monitor needs an arm rated for 35+ pounds to account for leverage when extended. Don’t trust marketing ranges like “supports up to 35 lbs”, look for the single-monitor maximum in the technical specs.
VESA compatibility is the mounting hole pattern on the monitor’s back. Most heavy duty displays use VESA 100x100mm or 200x200mm patterns (the distance between mounting holes in millimeters). Larger professional monitors may require 300x300mm or even 400x400mm. Verify both the arm and monitor share compatible VESA patterns before buying, adapters exist but add cost and potential wobble.
Check the mounting plate thickness too. Heavy duty arms should include plates at least 3mm thick with M4 or M6 bolts, not the thin stamped metal found on budget arms. The plate needs to distribute weight across the VESA mounting points without bending.
Top Benefits of Using a Heavy Duty Monitor Arm in Your Home Office
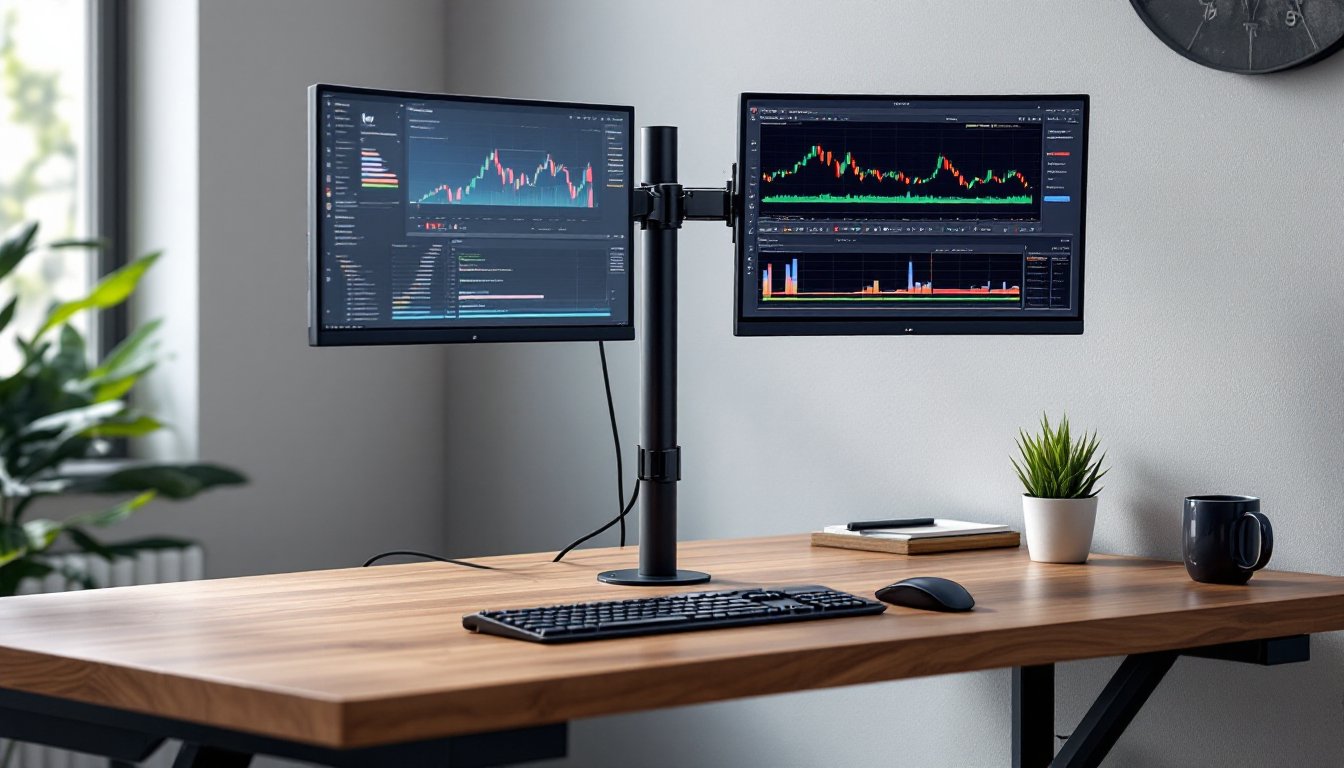
The obvious benefit is desk space reclamation. Removing a monitor stand frees up 100-200 square inches of workspace, enough for a notebook, external keyboard, or simply breathing room. For dual-monitor setups, that savings doubles.
Ergonomic flexibility prevents neck and eye strain. A quality arm allows height adjustment to position the screen’s top edge at or slightly below eye level, which reduces neck flexion during long work sessions. Tilt adjustment eliminates glare from overhead lighting, and swivel makes it easy to share the screen during video calls without awkward desk rearrangement.
Heavy duty arms offer better cable management than desk stands. Running power and video cables through the arm’s integrated channels creates a cleaner look and reduces the risk of accidentally yanking cables when adjusting the monitor. This matters more with high-refresh-rate or 4K displays that require specific cable types, damaged cables mean degraded signal quality.
For anyone working with color-critical applications, the ability to fine-tune screen angle eliminates reflections that distort color accuracy. Designers, photographers, and video editors need precise control over viewing angles, and heavy duty arms maintain those adjustments without drift.
There’s also a future-proofing element. Monitor sizes keep increasing, what’s considered large today becomes standard in two years. Investing in a heavy duty arm now means not replacing it when upgrading from a 27-inch to a 32-inch display down the road. The extra capacity provides headroom for monitor upgrades without buying new mounting hardware.
How to Install a Heavy Duty Monitor Arm: Step-by-Step DIY Guide
Installing a monitor arm is straightforward, but heavy duty models require extra attention to desk integrity and weight distribution. Budget 45-60 minutes for a first-time install.
Materials and tools needed:
- Heavy duty monitor arm kit (with clamp or grommet mount)
- Phillips and flathead screwdrivers
- Allen key set (usually included with arm)
- Stud finder (for wall-mount installations)
- Level (magnetic torpedo level works well)
- Protective cloth or mouse pad to lay monitor face-down
- Optional: power drill with bits for grommet holes
Safety first: Heavy duty monitors can cause serious finger injuries during installation. Wear work gloves when handling the monitor, and get a second person to help with monitors over 30 pounds. Clear the desk area completely, you’ll need space to work and room for the monitor to rest safely during installation.
Step-by-step installation:
-
Choose mounting location. Position the arm where it allows the monitor to reach the desired viewing position without maxing out the arm’s extension. For desk-edge clamps, you need at least 2.5 inches of desk thickness and a solid edge (not particleboard with veneer). For grommet mounts, measure the grommet hole diameter (usually 0.5 to 1.5 inches) and mark the drill point.
-
Inspect desk structure. Flip the desk or check underneath. Solid wood, plywood, or MDF over 0.75 inches thick handles clamp pressure well. Hollow-core desks or thin laminate tops need reinforcement, use a mounting plate (piece of 0.5-inch plywood) on the underside to distribute clamping force.
-
Attach the base. For clamp mounts, position the clamp assembly and tighten the bolt gradually, alternating between checking level and increasing pressure. Don’t overtighten, you’ll crack the desk. For grommet mounts, drill the hole (use painter’s tape to prevent splintering), feed the grommet post through, and secure with the locking nut from below.
-
Assemble the arm. Most heavy duty arms ship partially assembled. Attach the horizontal arm to the vertical post using the included hardware. Don’t fully tighten yet, you’ll need to adjust spring tension after mounting the monitor.
-
Mount the VESA plate to the monitor. Lay the monitor face-down on a protected surface. Align the VESA plate with the mounting holes on the monitor’s back (they’ll be either 100x100mm, 200x200mm, or larger). Thread the bolts by hand first to avoid cross-threading, then tighten with the Allen key or screwdriver. Don’t strip the threads, monitor housings are often plastic with metal inserts.
-
Attach monitor to arm. This step requires two people for monitors over 25 pounds. Lift the monitor and slide the VESA plate onto the arm’s quick-release mechanism (or bolt it directly if the arm doesn’t have quick-release). Support the monitor’s weight until the connection is secure.
-
Adjust spring tension. Most heavy duty arms have an Allen key adjustment point on the vertical post. Turn clockwise to increase tension (if the monitor sags) or counterclockwise to decrease tension (if the monitor rises on its own). The goal is neutral balance, the monitor should stay put wherever you position it without drifting up or down.
-
Route cables. Feed power, video, and USB cables through the arm’s cable management channels. Leave some slack at connection points to allow full range of motion without straining cables. Test the arm through its full range before securing cables with included clips.
-
Test all adjustments. Move the monitor through tilt, swivel, and extension ranges. Check that it holds position at various heights and angles. If there’s drift or wobble, re-check VESA mounting bolts and spring tension.
Choosing the Right Mounting Option for Your Space
Three mounting styles suit different situations:
Desk clamp mounts attach to the desk edge and work for most home office setups. They’re tool-free removable, leave no permanent marks, and handle desks 0.75 to 3 inches thick. The downside: they consume rear desk space and won’t work with desks pushed against walls with baseboards.
Grommet mounts require drilling a hole through the desk but offer a cleaner look and work with desks against walls. They’re permanent (you’re left with a hole if you remove the arm), but they don’t protrude behind the desk edge. Choose this for standing desks or situations where you need maximum desk-edge clearance.
Wall mounts are best for ultra-heavy setups or desks that can’t support clamp weight. They require locating wall studs, drilling into drywall, and using appropriate lag bolts (typically 1/4-inch diameter, 3 inches long into studs). Wall mounting is semi-permanent but supports the most weight and frees desk space entirely. Be aware: wall-mounted arms need careful planning for cable routing and may require conduit or in-wall cable management.
For home offices, desk clamp mounts offer the best balance of stability and flexibility unless the desk design prevents edge mounting. Renters should avoid wall mounts unless comfortable patching drywall when moving out.
Common Mistakes to Avoid When Buying a Heavy Duty Monitor Arm
The biggest mistake is trusting weight ratings without context. Manufacturers often list maximum capacity assuming optimal conditions, monitor mounted close to the base, minimal extension, no tilt. In real use, a monitor at full extension creates leverage that effectively increases its weight on the arm. A 30-pound monitor extended 20 inches can stress the arm as if it were 40+ pounds.
Another error: ignoring desk compatibility. Glass desks can’t support clamp mounts safely, the pressure point creates fracture risk. Desks with modesty panels or cable trays underneath may not provide clearance for clamp hardware. Measure before buying, and check customer photos for installation on similar desk styles.
Skipping VESA verification leaves people stuck with incompatible hardware. Some larger monitors use proprietary mounting systems or non-standard VESA patterns. Check the monitor’s user manual or measure the mounting holes directly, they should form a square pattern of 100mm, 200mm, 300mm, or 400mm between holes.
Buying single-arm solutions for dual monitors causes problems. Two separate single-monitor arms offer more flexibility than dual-arm models that share a single post. Shared posts create conflict, adjusting one monitor affects the other’s position. For heavy monitors, independent arms also distribute desk load better.
Many buyers underestimate cable management needs. Heavy duty monitors often require DisplayPort or HDMI 2.1 cables that are thicker and less flexible than standard cables. Arms with narrow cable channels or tight bend radius may not accommodate these cables, leaving them exposed and creating a messy look. Verify the cable channel width accommodates the specific cables you’ll use.
Finally, people often overlook return policies and warranties. Monitor arms are difficult to evaluate until installed with your specific monitor and desk combination. A 30-day return window and at least a 5-year warranty indicate the manufacturer stands behind build quality. Short warranties or restocking fees suggest the product may not perform as advertised.
For additional perspective on ergonomic workspace equipment and workshop organization tools, independent reviews often reveal long-term performance issues that don’t appear in manufacturer specs. Investing time in research prevents buying twice when a budget arm fails under load six months in.